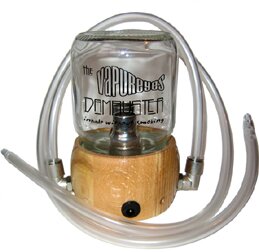
The Vapureyes Beta vaporizer is the latest portable plug-in vaporizer at an affordable price. The Vapureyes is available in most good headshops and well worth a try.

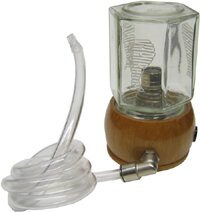
The Vapureyes vaporizer is small – not much bigger than a can of fizzy drink, so it’s really easy to carry around. It’s nicely finished too, with quality parts.

How to Use a Vapureyes Vaporizer:

  1. Take off the lid off the Vapureyes and put your herb (no tobacco) into
    the gauze bowl.
  2. Replace the lid, plug in the Vapureyes and switch on.
  3. After a couple of minutes, the Vapureyes Beta will begin to fill up with vapour. (Don’t expect to see too much – it’s not like smoke.)
  4. Next, inhale through the plastic tube.
  5. You will experience hardly any harshness on the throat and a very clean, clear buzz.

Vapureyes have recently brought out a dual system edition called the Vapureyes
Dambuster. The Vapureyes Dambuster has a double heating arrangement for vaporizing
2 different herbs at once. It can also be used by 2 people at the same time.
It’s still pretty small as well, so a great vaporizer to take to parties.

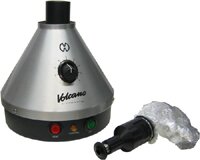
The Volcano vaporizer is the most expensive vaporizer in the shops at the moment, made by
Storz & Bickel. It doesn’t use hoses for inhalation. Instead, it uses
bags. The Volcano vaporizer is a plug-in device and as your herb vaporizes,
the bag attached fills up. The bag can then be detached and with the use of
a valve you can inhale when you like and pass it around without any vapour escaping.

How to Use the Volcano Vaporizer:

Choose your temperature.

Turn on the heat and leave for 3- 5 minutes.

Put your herbs into the chamber (this should be detached from the vaporizer).

Place the chamber inside the Volcano vaporizer and allow your herbs to heat.

Attach the bag to the chamber. The valve should click into place.

The bag will fill with vapour. Once full, remove the bag and the chamber together
from the Volcano vaporizer.

Separate the bag from the chamber, then connect it to the mouthpiece.

Inhale from the bag as required. Use the contents within 5 – 10 minutes.

The Volcano vaporizer can be purchased from good headshops and come with a 3 year guarantee.

A vaporizer is hailed by many as the best device for taking cannabis or other herbs. Rather
than burning anything, a vaporizer simply heats up your substance. This extracts
the most potent chemicals in your herb for you to inhale. Discover a whole new
world and whole new high.

Health

There are many advantages of using a vaporizer, the health aspect being the
most important. As there is no burning, there is also no smoke and therefore
no harmful carcinogenics are inhaled. When you smoke using cigarettes, joints
or pipes, you are taking in burnt chemicals that are extremely bad for you.
And these don’t just come from the herbs or tobacco. Paper is also very
nasty in that respect. With vaporizing, all you get are the chemicals that you
want to exploit and nothing more.

High

With cannabis, the high you get through using a vaporizer is much better than
the high from any other smoking method. Once you’ve tried vaporizing,
you’ll wonder why you ever bothered doing anything else. Imagine a completely
clear, clean high with no foggy, sluggish, zoned-out feeling – just happy
and buzzy and still able to conduct most tasks (apart from operate dangerous
machinery, of course!). This is because, when heated to the right temperature
with a vaporizer, the THC chemical is extracted from cannabis. THC is what gets
you high. Other chemicals such as CBD which slow you down are not extracted
unless heated to a much higher temperature or burned.

Economy

Because you need so little herb to get the desired effect and because you don’t
waste anything, your herbs will last much longer when you vaporize. Vaporizers
can be expensive to buy, but you will make your money back quickly if you are
a

Smell

The smell of smoke in your house can be unpleasant. It sticks to your upholstery
and your clothes and it’s very difficult to get rid of. Tobacco smoke
is bad, but some cannabis strains are worse in terms of potency. Vaporizing
virtually eliminates odour problems. You might smell a light trace immediately
after using your vaporizer but this is gone within minutes.

Click here to view a wide range of vaporizers, from handheld to digital. A vaporizer
is a big investment for your health and you pocket.

Read information and instructions for use on the following vaporizers:

The Master Blaster
Vaporizer

The Vapureyes Vaporizer

The Vapir Vaporizer

The Volcano Vaporizer

The Vaporstar Vaporizer

The Handheld Vaporizer

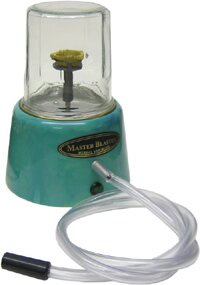
The Master Blaster vaporizer is one of the first electrical vaporizers to come onto
the market. It’s a simple and sturdy design, great for a first try.

It’s really easy to use:

  1. Put your herb into the gauze bowl inside the chamber of the Master Blaster
    vaporizer. (Never mix your herb with tobacco – there is no need.) Replace
    the glass jar.
  2. Plug in the Master Blaster vaporizer and leave for a couple of minutes.
    You should see a faint mist building up in the chamber.
  3. Inhale through the plastic tube.

If you’re used to smoking, this might feel a bit strange because you
expect to feel that kind of kick in the back of your throat to tell you that
you’ve inhaled enough. But inhaling with a vaporizer is much less harsh
on the throat and you may not notice anything. Keep inhaling until your herb
stops releasing vapour. Sit back for a couple of minutes and you’ll soon
start to enjoy the effects.

Master Blaster vaporizers are available to buy at reasonable prices at all
good headshops.

Health

Bongs have many advantages over joints and pipes. For one thing, smoking bongs is healthier
for your lungs. The water in a bong filters harmful impurities and it cools
the smoke down before it gets to you, so you get a much smoother hit. Bongs
also don’t involve the use of any paper which only add to your intake
of and chemicals and toxins.

Variety

Bongs come in all shapes and sizes. Some bongs on the market today are designed
with extra features such as ice bongs. Ice bongs allow you to have ice above
the water level to act as a second filter, catching more tar and further cooling
down the smoke.

Economics

Another important factor is wastage. When you smoke joints, a lot of your mix
will burn away when you’re between tokes or passing it around. However,
with a bong, you use up your mix within a few tokes and you only need to load
a small amount. And if you do want to save some for later, you can easily extinguish
the bowl and you won’t lose any mix. The impact of smoking a bong is much
stronger than the impact of smoking a joint or pipe. This means that you don’t
need to use as much in order to get high.

Fun-factor

The ritual of making joints is something that your regular toker enjoys. But
consider the endless possibilities of creating your own bong. You can be inventive
in many ways, from testing different materials and sizes to adding extra pieces
for multi-user bongs. Making a bong can also be good social activity. Especially
when you’ve had a few smokes and you’re feeling creative. Always
try to personalise your own bong in some way, to add to the pleasure of using
it. For more advice on bong materials and where to find them, read How to Make
a Basic Bong
.

Downside

I suppose the only disadvantage is with a bong is that it’s not so easy
to carry around. But you can find good travel bongs in most decent headshops these days. It’s worth trying out one or two, even if you just want to
vary your smoking habits.

Interesting fact: The word “bong” comes
from the Thai word “baung” which refers to a cut off section
of bamboo.
Cypress Hill, a well-known hip-hop band paid tribute to the bong in
their imaginatively named track “Hits From the Bong” …

Track: Hits From the Bong

Artist: Cypress Hill

Album: Black Sunday
“Hits From The Bong

Hits From The Bong

Hits From The Bong

Hits From The Bong

Pick it, pack it,

Fire it up, Come along,

And take a hit from the bong,

Put the blunt down just for a second,

Don’t get me wrong it’s not a new method,

Inhale, Exhale,

Just got a ounce in the mail,

I like a blunt or a big fat cone,

But my double barrel bong is gettin’ me stoned,

I’m skill it, There’s water inside don’t spill it,

It smells like shit on the carpet,

Still it, goes down smooth when I get a clean hit,

Of the skunky funky smelly green shit,

Sing my song, puff all night long,

As I take Hits from the bong…

Hits From The Bong y’all

Gonna get high,

Hits From The Bong

Gonna get high,

Hits From The Bong

Gonna get high,

Hits From The Bong

Let’s smoke that bowl, hit the bong,

And then take that finger off of that hole,

Plug it, unplug it,

Don’t straaaain, I love you Mary Jane,

She never complains, when I hit Mary,

With that flame, I light up the cherry,

She’s so good to me, when I pack a fresh bowl I clean the screen,

Don’t get me stirred up the smoke, through the bub-bling water,

Is Makin’ it pure so I got ta’, take my hit and hold it,

Just like Chong, I hit the bowl and I reload it,

Get my four-footer and bring it on…

As I take Hits from the bong,

Hits From The Bong

Can I get a hit

Hits From The Bong

Can I get a hit

Hits From The Bong”

Can I get a hit

Hits From The Bong

Can I get a hit

Hits From The Bong

Can I get a hit

Straighten your dick out…

Can I get a hit …

Hits From the Bong

Hits From the Bong

Hits From the Bong

Hits From the Bong
It’s really important to use good quality materials for your reefer rituals.
Let’s take a look at the things you will need:

1. Rolling Papers

papers-and-cones-final-copy

The better the rolling papers, the better your joint will smoke and the fewer unwanted chemicals you will inhale.
There are all sorts of good, natural papers on the market so it’s worth trying them out. Some of the best include OCB, Smoking, and Kulu. Rips are also great fun – you can tear these off at any length to get whatever size spliff you want!

Bad papers come far too thick so you take in a lot of carbon, they’re
bleached white and often the gum doesn’t stick properly. This gets very
frustrating, especially if you’ve already smoked a couple of fat ones!

2. Roach

kulu-roach

Roach is used to filter much of the tar and carcinogens as well as stopping
you from getting bits of tobacco and weed in your mouth. It also gives a good
shape to the joint and makes passing it around much more practical.

Roach can be made from many things that you can find around the house, such
as empty papers packets, thick magazine covers, family get-together invitations…
As long as it’s thick enough to stay straight once you’ve rolled
it and thin enough for a reasonable sized joint end – well, you’ll
get the hang of it.

Some professional tokers prefer to buy roach rather than faff around tearing
things up all the time. It comes in little ready made books of strips that are
just the right size and thickness. Some even come with perforated lines to make
them easier to roll. It’s good to know that people get paid to think about
the true needs of the toking community!

3. Mixture


If you prepare a decent mix, rolling your joint will be much easier. Take time
to remove lumps or sticks if you’re using herb. Aim to get your mix as
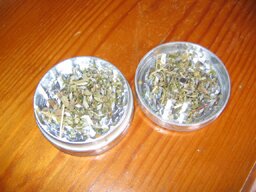
fine as possible. A grinder is an invaluable tool for regular herb smokers.
Grinders crush up your bud so that you’re left with a mix that you can
spread evenly into your joint. A grinder is a good, economical investment –
you’ll find your weed lasts longer once it’s ground. A pestle and
mortar is another option, or a decent pair of scissors can also suffice.

If you’re using hash, try to crumble it into a fine powder as you put
it into your joint. You don’t want large lumps to get in there – they
always fall onto your best trousers and burn holes when you’re smoking
your joint. These lumps are called hot-rocks. The way your hash crumbles does
depend on the type and quality. If you need a hash grinder you can get these
at most good head shops.

Tobacco is generally used in joints to aid burning, to make your weed last
longer and to stop you getting too wasted too quickly. However, if you’re
using weed (not hash) a pure cannabis joint is a total treat.

The waterfall bong is a variation of the bucket bong. It’s economical and highly
effective.

You will need:

  1. 2 litre plastic bottle
  2. Tin-foil
  3. Scissors
  4. Herb mix
  5. Someone to help you

Step-by-Step:

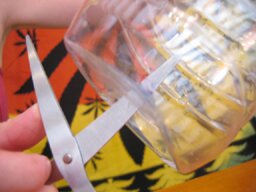
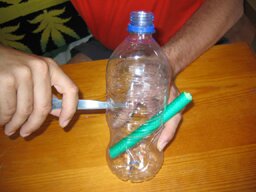
Take the 2 litre bottle and cut or drill a hole in the middle of the base, at
the lowest point.

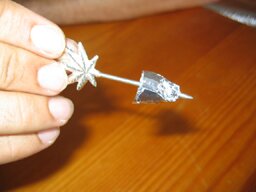
Make a bowl to fit over the top of the bottle which will hold your herb mix.
This can be constructed easily from tin foil with a few holes pinned through
it if you don’t have anything else to use. (See How
to Make a Basic Bong
for more detailed instructions.)

Hold your finger over the hole at the bottom of the bottle and fill it with
water.

Get a mate to fill your bowl with your herb mix, place it into the top of the
bottle and light it.

Release your finger from the bottle. As the water drains out, gravity will pull
the smoke into the bottle and you end up with 2 litres of smoke trapped inside
your bong.

Replace your finger over the hole. Remove the bowl (careful – it will
be hot) and put your mouth over the top of the bottle to inhale the smoke. The
hole at the bottom can also be used as a rush-hole to force the smoke into your
lungs half way through your toke.

Bucket bongs (gravity bongs) give you a seriously intense hit and nothing gets wasted except you!

You will need:

  1. 2 litre plastic bottle
  2. Bucket
  3. Tin Foil
  4. Herb mix

If you have a nearby headshop (or check online) you can buy bowls and gauze
which you can use instead of tin-foil.

Step-by-Step:

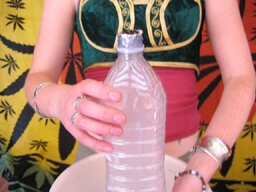
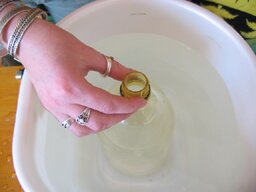
  1. Cut off the base of the bottle.
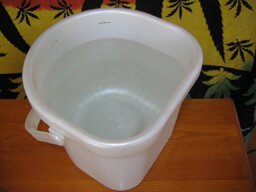
  2. Fill the bucket with water.
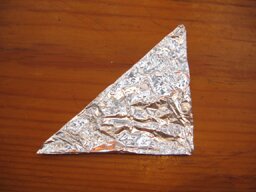
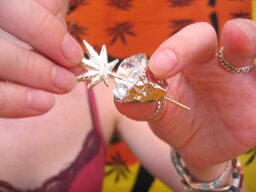
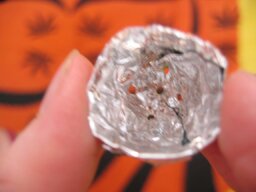
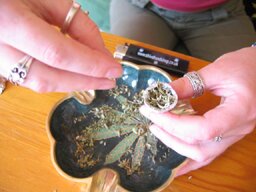
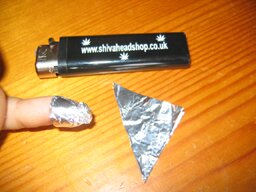
  3. Cut a square of tin-foil and fold it into a triangle (it should be 4 layers thick). Then twist the foil around your finger to make a cone/ bowl shape
    and cut away any excess. Pierce the base of it a few times with a pin.

  4. Push the bottle into the bucket so that it fills up with water.
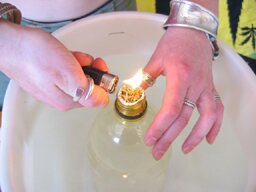
  5. Fill the bowl with herb, then place it in the top of the bottle and light.
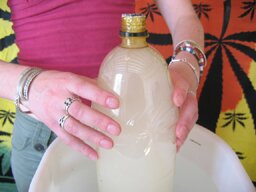
  6. Pull the bottle up and it will fill up with smoke. Make sure you don’t
    pull it all the way out of the water.

  7. Take off the bowl and put your mouth over the top of the bottle (mind your
    fingers – the bowl can get pretty hot!).

  8. As you inhale, gravity pulls the bong down into the bucket and forces the
    smoke straight into your lungs.

  9. Sit down – you might find things going sideways rather quickly!

If you can’t be bothered to make a gravity bong, there’s a great
one on the market called the Bukket
Bong. It’s really effective, doesn’t need any water and it’s
totally portable – comes with its own bag and everything!

Choosing good materials will make your bong construction easier and your toking experience more pleasurable. Follow the guide-lines below for advice on bong materials, construction and operation.

Choosing your materials

You will need:

  1. A plastic container
  2. Hosepipe
  3. Tin-foil
  4. Bluetack (or silicone if you can get hold of it).
  5. Herb mix
  6. Grinder
  7. Scissors
  8. Water supply

If you have a nearby headshop (or check online) you can buy things like ready-made stem and cones (downpipes) or separate drop-in cones, then you can do away with the hosepipe and tin foil.

  1. The plastic container is the main chamber for your bong. It can be anything
    that stands upright without falling over and has a small enough hole at the
    top for a mouthpiece. If you’re in doubt about what plastic to use,
    the general rule is that if you can use it to pack food, it’s safe to
    use for a bong.
  2. Your bong’s stem can be made from cut down hosepipe.
  3. A make-shift bowl for your bong can be made from layers of tin foil with
    pin-holes punched through. Or you might find a suitable part from an old pipe.
    Consider the size of your bong bowl and how much mix you want it to hold.
  4. Your bong must be airtight to avoid wastage and ensure a smooth toke. Silicone
    is the best option, but if you don’t have a nearby supplier, go for
    something like Bluetack.
  5. Your herb mix is whatever you fancy. Some people mix tobacco with herb when
    smoking bongs, but you don’t have to do this. As long as you’ve
    got plenty of your favourite herb – that’s the main concern.
  6. Grind your mix before you smoke it – this makes for an easier toke (and
    you can pack it down and get more in when it’s finer).
  7. To make holes in your container you’ll need scissors or other sharp instruments.
  8. All bongs need water so make sure you’re near a clean water supply.

Constructing Your Bong

  1. First, make a hole in the side of your plastic container. Make sure it is
    high enough up to allow at least half of your stem into the container.
  2. Cut a hole in the opposite side of the container. This will be the rush-hole
    (or “zoom-hole”) for your bong. It should be positioned so that
    you can easily reach it with your thumb when you toke, but not too low –
    you also need enough space for your bong water.

  3. Insert your stem through the first hole. Try to keep it as upright as possible.
    Whilst smoking from your bong you want the bowl to face upwards to ensure
    no mix falls out.
  4. Seal the join around the stem and the plastic container to make your bong
    airtight.
  5. Cut a square of tin-foil and fold it into a triangle (it should be 4 layers
    thick). Then twist the foil around your finger to make a cone/ bowl shape
    and cut away any excess. Pierce the base of it a few times with a pin.

  6. Fill around 2 inches of your bong with water. Make sure it is about 1 inch
    below the rush-hole, otherwise water might spill when you toke.
  7. Fill your bowl with your herb mix. Insert it into your stem. You’re
    ready for a hit.

Operating Your Bong

  1. Place your mouth over the bong’s mouthpiece (the top of the plastic
    container).

  2. Place your thumb or a finger over the rush-hole.
  3. Half way through your inhalation, release your finger from the rush-hole.
    This has the effect of shooting the rest of the smoke out of the bong and
    straight into your lungs.

Powered by WordPressWeb Design by SRS Solutions © 2011 weedmania For Everyone Design by SRS Solutions
Sitemap