What is a Blunt?
A blunt is a joint made from a tobacco leaf wrapped around pure cannabis – a cannabis cigar. Blunts have become very popular in recent years, especially due to their
constant mention by gangster rappers in their lyrics. Blunts get their name
from Philly Blunts – an American brand of cigars. Smokers would take out
the inside of a regular cigar and replace it with marijuana. The word “blunt”
has now come to mean any tobacco wrap. Blunts are now sold as individual leaves
for you to make your own cigars. They come in many brands with many different
flavours to choose from.
The benefits of using blunts are:
a) they burn slower than joints so less is wasted and you can pass them round
more people
b) they hold more cannabis than a joint
c) you can extinguish and relight them as often as you want
d) they’re easy to carry around and they don’t look like illegal
drugs
e) many people report that they get a more intense high from blunts due to the
tobacco leaf reacting with the marijuana
Here’s how to roll a blunt from a pre-made cigar
like a Philly Blunt…
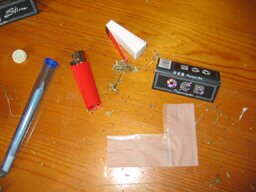
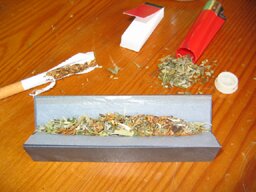
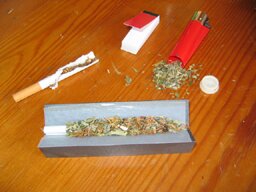
You will need:
- Philly Blunt
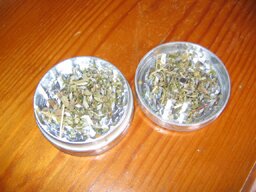
- Herb
- Grinder or scissors
-
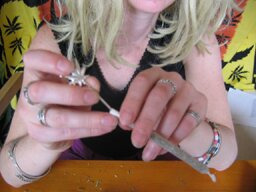
Step-by-Step:
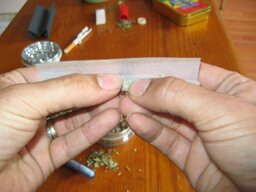
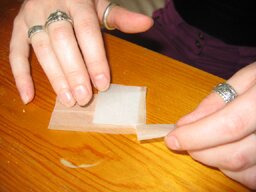
- Lick your cigar and open it by cutting a straight line down the middle (from
tip to butt) using a razor blade or just with fingers.
- Take out the contents and the inner layer of leaf
wrapping so that you are left with just the outer layer. Too much tobacco
with your blunt can result in a harsh taste.
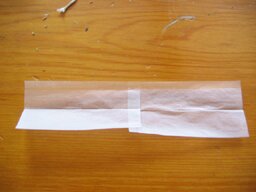
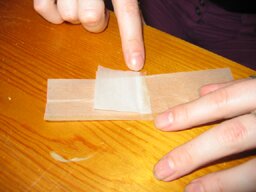
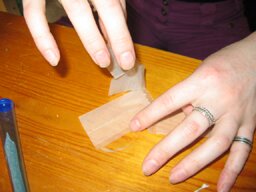
- Tear off any excess so that you have a rectangular
blunt wrap. Blunt wraps are delicate so be careful and don’t rush this.
Any unwanted tears you make around the edge can usually be resealed with saliva.
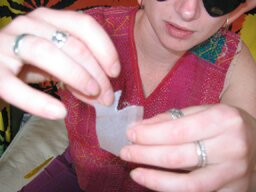
- Fold your blunt wrap in the same way as you might
fold a rolling paper before you load it.
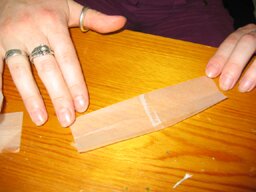
- Spread your herb (make sure it is well-ground first)
into your blunt wrap. Use plenty so that your blunt will stay firm.
- You can also add a large roach if you like to avoid
wasting any herb. Some strong card rolled into a tight spiral would be ideal.
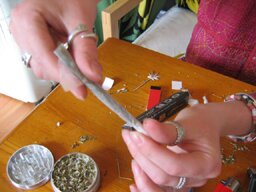
- Roll up your blunt wrap, remembering to keep the mouth
end big enough for an easy toke.
- When there is about half an inch left to roll, lick
all the way down it and seal it up.
- Use a lighter to dry your blunt by running it up and
down for a few seconds. Alternatively, put it in the microwave for a few seconds.
Doing this will make your blunt sturdier and easier to smoke.
- Spark up, lay back and enjoy the ride.
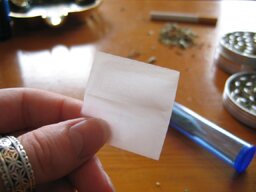
You can also make blunts from blunt wraps sold individually:
The advantage of using individual blunt wraps is that you don’t have
to remove or waste any of the content – you only get what you need for
rolling. Individual blunt wraps look much like large rolling papers. They come
in all sorts of flavours. Some recommended ranges are EZ Roll Tubes and Platinum
Blunts.
You will need:
- Individual Blunt Wrap
- Herb
- Grinder or scissors
Step-by-Step:
- Take a blunt wrap of your favourite flavour, or maybe a natural wrap.
- Uncurl your blunt wrap then fold it in the same way as you might fold a
rolling paper before you load it.

- Make sure your mixture is well-ground. You can use a grinder for this or
a pair of scissors. This will prevent any small sticks or lumps from tearing
your blunt wrap.

- Spread your herb (make sure it is well-ground first) into your blunt wrap.
Use plenty so that your blunt will stay firm.

- You can also add a large roach if you like to avoid wasting any herb. Some
strong card rolled into a tight spiral would be ideal.

- Roll up your blunt wrap, remembering to keep the mouth end big enough for
an easy toke.

- When there is about half an inch left to roll, lick all the way down it
and seal it up.

- Use a lighter to dry your blunt by running it up and down for a few seconds.
Alternatively, put it in the microwave for a few seconds. Doing this will
make your blunt sturdier and easier to smoke.


- Spark up, sit back and enjoy the ride.

***Tip: Try using honey instead of saliva to seal your blunt wrap. This will
add a smooth sweet taste to your smoke.***

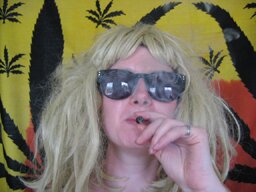
If you’re still in any doubt, take a lesson from rapper Redman:
“How To Roll A Blunt” Lyrics
“(Awwwwwwwwwwwwwwwwwwwwwwww SHIT!!)
Check it out
Yo, 1992 begins the new wave for the blunt rollers
You know what I’m sayin’?
The saga of the Philly blunt continues
The flava’s the P-Funk y’all, get wit it
Check it out…
Verse 1
Check out a new type of gimmick which is splendid
Since you’re down with other shit, let’s see if you’re down with this
It’s about… strictly trying to roll a blunt
When you get the hang of it, you’ll catch more blunts than Archie Bunk
First of all you get a fat bag of ism
From uptown, any local store sells the shit friend
Purchase a Philly, not the city of Philly
Silly punk, I’m talking ’bout the shit called the Philly blunt
Lick the blunt and then the Philly blunt middle you split
Don’t have a razor blade, use ya fuckin fingertips
Crack the bag and then you pour the whole bag in
Spread the ism around until the ism reach each end
Take your finger and your thumb from tip to tip
Roll it in a motion then the top piece you lick
Seal it, dry it wit ya lighter if ya gotta
The results, mmmmmmmm… proper
Chorus
That’s how you roll a blunt
That’s how you roll a blunt
That’s how you roll a blunt
That’s how you roll a blunt
That’s how you roll a blunt
That’s how you roll a blunt
Let’s all roll a blunt
… and get fucked up (yea)
(Repeat)
Verse 2
The second paragraph might make you laugh
When a brotha rolls a blunt and his breath smells like gr-ass
That’s when you know you gotta take the blunt from him
Cuz his breath has the dragon in the dungeon
(Yo, yo, yo, light the blunt. Uh yo, here’s the lighter…)
I would if this shit would stop drippin’ wit saliva
And if you gonna lick it, don’t drown it with ya spit, shit
I dunno what dick or last puss you licked quick
And how ’bout the non-blunt rollin’ females
That always fucks it up ‘cuz they don’t wanna break their Lee nails
(Hee hee hee hee hee, sorry Red for spilling it…)
<BEEEITCH> You better pickup every seed of it
Because I paid 10 bills for the get ill
And for spilling it you better get lost or get grilled
Bo know everything from sports to other stuff
But I bet you Bo dunno know to roll a blunt.
(Chorus)
(Hey nigga pass the gotdamn blunt. Shit! What you holding it all day for?
Sit yo big ass down…)
Bridge
Yo, yo, check this out
I want all the real niggas out there and the females too
If you got a fat blunt in ya mouth and you feeling high as hell
I want y’all to repeat after me, check it out
I’m fucked up (I’m fucked up…)
I’m fucked up (I’m fucked up…)
I’m high as hell (I’m high as hell…)
I’m high as hell (I’m high as hell) Yea.
Verse 3
Last but not least, Redman would like to say peace
To all the blunt rollers from the Tri-State to the Middle East
And gimme a blunt when I kick the bucket
Devil or no devil when I am the wrong to be fucked with
So everybody put they blunt up in the air
Take a puff, blow the smoke out like ya just don’t care
So..(pump up the volume) ..so it’s heard thru the next block
I’m out, peace to Red Foxx, I’m off to the cess spot.
Outro
(Yea, DJ Twinz in the house)
Yea, Redman’s in the house
Yo, peace to Pack Pistol Posse, the 4,5,6
Yo, I’m out, yo Reg
Turn this shit off man (Yo turn that shit off..)”